As a photographer, you understand the importance of capturing accurate colors in your images. One of the most critical settings to get right is the white balance, which can make or break the overall aesthetic of your photos. In this article, we’ll delve into the world of white balance, exploring the different types, how to set them, and some expert tips to help you achieve the perfect balance for your camera.
What is White Balance?
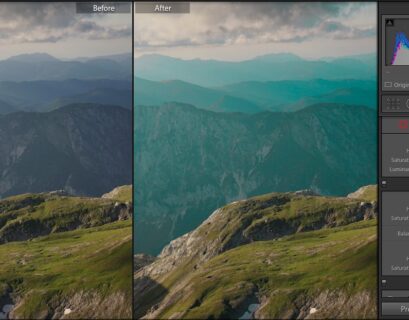
White balance, also known as color temperature, is the process of adjusting your camera’s settings to accurately capture the colors of a scene. It’s a crucial step in ensuring that your images look natural and true to life. Think of it like adjusting the tone of your camera to match the lighting conditions of your scene.
Types of White Balance
There are several types of white balance settings, each designed to accommodate different lighting conditions. Here are the most common ones:
- Auto White Balance (AWB): This setting allows your camera to automatically detect the lighting conditions and adjust the white balance accordingly. AWB is a great starting point, but it may not always produce the most accurate results.
- Daylight: This setting is ideal for outdoor photography, especially during the daytime. It’s designed to capture the warm, natural light of the sun.
- Shade: This setting is perfect for indoor or shaded areas, where the light is softer and more diffused.
- Tungsten: This setting is designed for indoor photography, particularly in areas with artificial lighting, such as incandescent bulbs.
- Fluorescent: This setting is ideal for areas with fluorescent lighting, which can produce a greenish tint on your images.
- Custom: This setting allows you to create a custom white balance setting based on a specific lighting condition or color temperature.
How to Set the White Balance on Your Camera
Setting the white balance on your camera is relatively straightforward. Here’s a step-by-step guide:
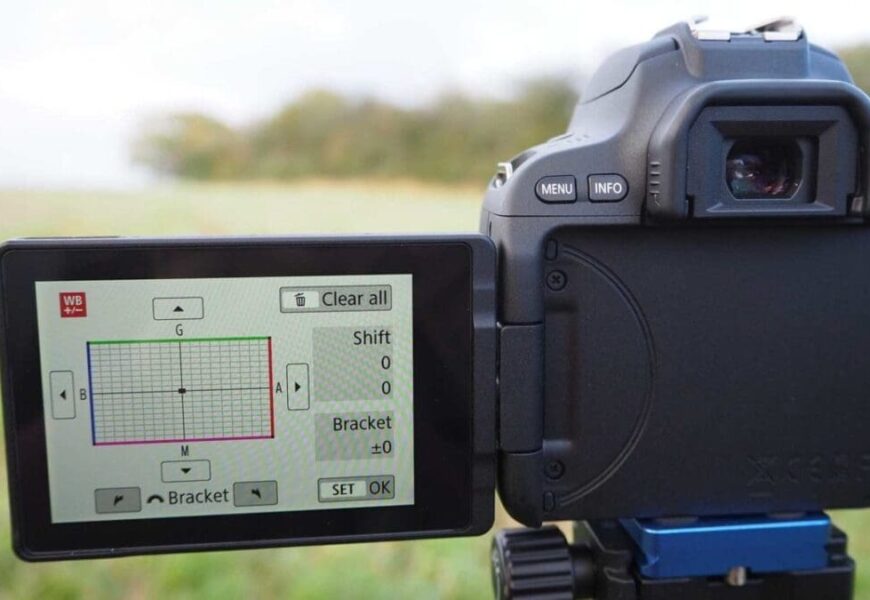
- Access the White Balance Menu: Depending on your camera model, you may need to navigate to the “Menu” or “Settings” menu to access the white balance settings.
- Select the White Balance Mode: Choose the type of white balance you want to use, such as Auto, Daylight, Shade, Tungsten, or Fluorescent.
- Adjust the White Balance: Use the camera’s controls to adjust the white balance settings. You may need to adjust the settings based on the lighting conditions of your scene.
- Use a White Balance Reference: If you’re shooting in a specific lighting condition, such as a studio with fluorescent lights, you can use a white balance reference card to help you set the correct white balance.
Expert Tips for Setting the Perfect White Balance
Here are some expert tips to help you achieve the perfect white balance:
- Use a Gray Card: A gray card is a great tool for setting the white balance. It’s a card with a neutral gray color that can help you adjust the white balance to match the lighting conditions.
- Shoot in RAW: Shooting in RAW format gives you more flexibility when editing your images, allowing you to make adjustments to the white balance and other settings.
- Bracket Your Shots: Bracketing your shots can help you capture a range of white balance settings, allowing you to choose the best one for your image.
- Use the Camera’s Built-in White Balance Presets: Many cameras come with built-in white balance presets for specific lighting conditions. Use these presets as a starting point and adjust as needed.
- Experiment and Adjust: Don’t be afraid to experiment and adjust the white balance settings based on the lighting conditions of your scene.
Conclusion
Setting the white balance on your camera is a crucial step in capturing accurate colors and achieving the perfect aesthetic for your images. By understanding the different types of white balance and how to set them, you’ll be well on your way to creating stunning, professional-looking photos. Remember to experiment, adjust, and fine-tune your white balance settings to achieve the perfect balance for your camera. Happy shooting!